Showing posts with label fabric. Show all posts

Monday, February 8, 2016

Pink Camouflage Wristlets

I have a dear friend who loves pink camouflage.  Seriously loves it.  For Christmas, I surprised her with a tote bag  (which I forgot to photograph) out of pink camouflage and, as anticipated, she loved it.  Really, really loved it. 
Pink camo - who knew??
Now, personally, I'm not a huge fan of pink camo (really, of any camo);  I don't understand it.  Are you hiding in the Barbie aisle at Toys R Us?  I just don't get it.  Still, it was a labor of love and she truly loved her Christmas present, which was my goal, after all.  I decided to use the leftover fabric to surprise her with another gift and I ended up having enough fabric to make a little something for her daughter (another fan of pink camo), too. 

Mother - Daughter gifts...
(I always by extra fabric when I'm making something specific...I'm terrified to run out of fabric.)  Anyway, it turned out that I had just enough fabric to make two of Dog Under My Desk's "The Essential Wristlet". 


Spiral bound from my local copy shop.  Lays flat for me to flip
through the instructions as I sew along, one step at a time.
If you haven't discovered Erin's patterns, you're in for a treat.  Her instructions are so detailed, and her photos so clear, you just can't go wrong.  Since I've been making her stuff, my skills and my confidence have increased tremendously.  Plus, I love that her  "thing" is that she loathes exposed unfinished seams, so you always have a nice, polished result when you make her patterns.

Pocket detail on the inside of each.
So, back to my project.  Two Essential Wristlets with boxed corners.  I also decided to embroider each woman's name on them, for a little added touch. 
Awesome pattern nets awesome results!

I think they turned out really well.  The wrist strap is detachable and the bag measures 8.5 x 5.5 x 1.5 inches, so its a really nice size.  I think my friend and her daughter will be pleased.  Best of all, no more pink camo in my fabric stash...it has all found its rightful home.


Wednesday, August 8, 2012

Fabric Bins

I've been needing some more storage in our bathroom and thought fabric bins would be the ideal solution.  Unfortunately, I haven't been able to find bins I like.  While I was at Hancock Fabrics last week, I saw this fabulous fabric and thought it would be perfect.  (It wasn't, but that is a later part of the story.)
I love this fabric...it is so beautiful.
Isn't this fabric beautiful?  I knew it would make beautiful storage bins.

This was the second bin I made...it came together so quickly and easily.
I saw this tutorial for making fabric bins from Make It and Love It and I decided it was actually doable.  Honestly, it turned out to be a little more difficult than "beginner" level, but not so difficult that I was discouraged by it.  Once I'd made the first box (following the super terrific instructions), the second box was a breeze.

This is the larger bin...it is the size the tutorial makes.
It only took two evenings to get the boxes done.  I am really pleased with how they turned out and, once I'd finished the first box, I understood exactly what I needed to do to change the dimensions to suit my space.  Unfortunately, they just didn't look right in the space...darn it.

A different view of the first bin...I didn't put in a label pocket.
That's okay, though, I've already thought of an alternative use for both bins.  Even better, I found another fabric (a completely different style) that I'm getting ready to use for two more fabric bins. 

I just love, love, love this fabric!
So, what else can I do with this fabric?  I love it that much.  I'm racking my brains trying to come up with something I can do with it.  Do you have any ideas?

Wednesday, March 7, 2012

Doctor Who Backpack and Pouch

Normally, I wouldn't show you another backpack made from the same pattern I used to make this cutie, but the fabric for this project was so cool, I just couldn't resist bragging a little.  A friend of our was turning 18 in February and I really couldn't think of what to give her.  She's away at college and I didn't want to give her something that would just be in the way in her dorm room.    I thought the backpack I made Buttercup would be perfect for my friend, but I wanted to come up with amazing fabric (the kitty fabric I used for Buttercup's bag was far too young for this bag).  A quick search at Spoonflower provided the perfect fabric:  Doctor Who fabric!  In case you didn't know it, the Nagle5 are total geeks!  Serious geeks.  As such, I happened to know that my young friend is a huge Doctor Who fan.   Honestly, the most difficult decision at this point was figuring out which fabric to pick!

This one with the Tardis by Studio Fibonacci was my ultimate choice.  I liked the color and the subject material...it is just so cool.   (It is okay if you're not a Doctor Who fan and you just don't get it.  Just work with me here.)


After the fabric arrived, I headed to Hancock Fabric to find a suitable fabric for the lining.  I think the one I found matched beautifully and "girled" up the entire project.


Since I planned to include a check, I sewed this little zipper pouch to go with the backpack and put the card and the check in the little pouch.  All in all, I was thrilled with how it turned out.


Best of all, the recipient loved it (she actually called me to thank me!) and the bag is currently enjoying winter break in the U.K.   Taking the Doctor Who bag to the land of its origin!  How cool is that?

Sunday, March 4, 2012

Just in Time for her Birthday...

I thought I'd show you Buttercup's Christmas present.  It all started with this bathroom makeover.  Buttercup fell in love with the paint color I'd chosen: Water Sprout.  After that, she was convinced her life would be perfect if only her bedroom was painted Water Sprout.  Well, I've been down this road a few times with my beloved daughter, so I made her a deal.  If she still wanted her room done over, we'd do it for her in January.  That gave her four months to mull it over and four months to convince me this wasn't a whim.


Once she'd convinced me, I talked it over with Superman.  While he was a bit dumbfounded when I told him her dearest wish was to have her bedroom done in Water Sprout, he was all for it when I suggested that rather than making her wait until after "Daddy went back to work after Christmas break", we surprised her with Daddy and Mommy doing it for her as her Christmas gift from us.


 With a little help from Santa in the form of a new dresser, Daddy and Mommy redid Buttercup's room to her exact specifications.  (And yes, it was done in January before Superman headed back to work, I just haven't found the time to write a post about it.)

So, this is what it looked like before:


And this is what it looks like now:


We removed the shelving in the niche under the window and, instead, put her bed in the niche.  (Interestingly, we offered the girl a double bed, and she turned it down...so, this is the same bed.)  She wanted to be part of her project, so she used her own money to buy the comforter and pillow sham (clearance at JC Penney - she got a steal).


Superman made a padded headboard and added these little corner shelves on each side of the bed to serve as a bedside table.  I had the extra-long sheer curtains from our California house and they worked beautifully here...just used a shower curtain rod to hang them.


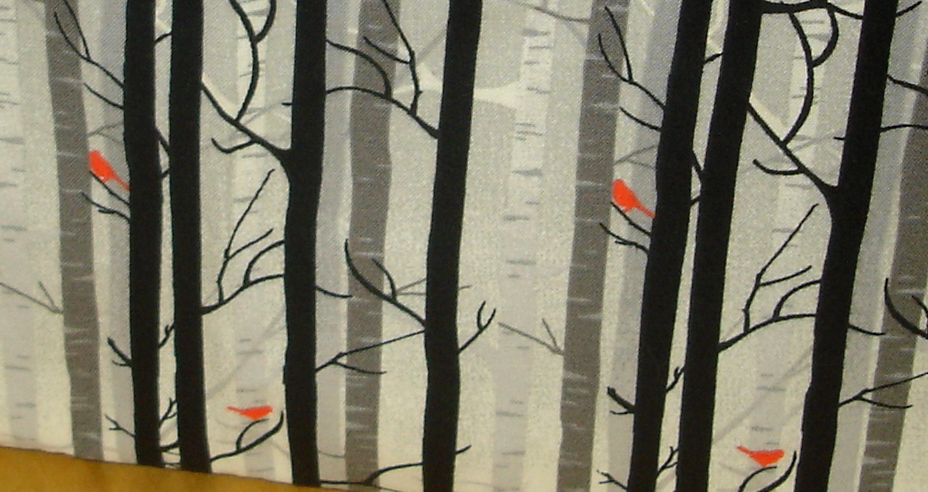
With leftover fabric from the headboard project, Superman cut down an old bulletin board we had, covered it in the fabric, and added some decorative moulding to make it tie in with the rest of the room.


Finally, I used another scrap of the fabric to cover a cork board that Buttercup uses for her jewelry, bringing the fabric all throughout the room and tying it all together.  (A totally simple project with fabulous results.)

So, there you have it Buttercup's Christmas present...pretty cute for an almost 13-year old, isn't it?

PS.  Green really has taken over our house, hasn't it?


Thursday, February 2, 2012

Quick Fix for a Bentwood Rocker

I love Bentwood rockers.  I have had two and think they're just so pretty.  The one I currently have has been moved all over the house, filling in whenever I need extra seating in a room.  After being in a high usage area for maybe too long, I brought it downstairs to protect it.  Unfortunately, I think I was a little too late.  This poor rocker couldn't handle the pressure anymore and its cane seat finally gave up the ghost.


I just couldn't bear to get rid of the chair, but I didn't really want to learn to recane it right now.   I'd seen "before and after" shots where people had reclaimed rocking chairs and thought we could do it.    I pulled out the cane seat and discovered that there is a lip there that can hold a thin board.  Now my biggest problem was a lack of skill with the jigsaw to create a board in the necessary shape.  (I'm pretty handy with the scroll saw, but controlling the hand-held jigsaw isn't one of my strengths...yet.)  Once I explained what I was trying to accomplish, my beloved Superman came to my rescue.    We headed to Home Depot, picked up a small sheet of 5mm underlayment, then headed over to Hancock fabric to pick up a square of foam, and some adhesive to make the foam and the underlayment stay friends and we were ready to salvage this chair. 


First, Superman traced the shape of the seat using the broken cane seat, then he cut out the board and refined the shape with the sander.  Using the board as a template, he traced the shape onto the foam and cut it in the appropriate shape using a bread knife.  At that point, he was ready to glue the foam onto the board...a little spray adhesive sprayed onto the board did the trick.  Oh, he's says it really isn't movable once the foam meets the glue, so keep that in mind.   (He's not big on stopping for pictures, so you'll just need to use your imagination for this process.)   I was ready to cover the cushion with fabric I already had, but he ran with that, too.  A staple gun and a few minutes later, he had the cushion ready to go.  He finished the project off with a few finish nails to attach the seat to the rocker and, viola, my Bentwood rocker is one again usable.   I think the entire project (not including the trips to Home Depot and Hancock Fabric) took about 1/2 hour, maybe 45 minutes.


Not only that, it is sturdier than ever.  This is the xBox chair these days, so it is withstanding the enthusiasm of teenagers.  Need I say more?


One note:  I think I need to hot glue a piece of cording around the seat to camouflage the edge, but I haven't gotten around to it.  I thought you'd like to see the down and dirty, though, to make it easier to picture the process.

Wednesday, February 1, 2012

Hand-Painted Pillow

More Silhouette fun!.  I've seen a lot of tutorials through the years about using stencils to decorate everything from shirts to walls and everything in between, but I've never actually tried to do it myself.


That all changed last weekend when I used my Silhouette machine, some clear vinyl, painter's tarp, and some of the Martha Stewart multi-surface paint to create this amazing pillow.


It turned out to be quite simple.   I cut out two pieces of the painter's tarp (still the same tarp I've used for previous projects!) into 18" squares and ironed them flat.  I used the Silhouette to cut out my desired shape (which, in this case, was "summer tree" from Silhouette Studio) and placed it on one piece of the painter's tarp.  (There is no picture of this step, as clear vinyl doesn't photograph well.)  Once the vinyl was in place, I mixed a couple of colors of paint to get the color I wanted and started using the sponge dabber to apply the paint.  You can clearly see the vinyl.


When I was done, this is what it looked like.  Using the clear vinyl, I can clearly see exactly where the painted image is in relation to the entire piece.


Then, because I was I was too impatient, I used a heat gun to accelerate the drying process and peeled off the vinyl.  Doesn't it look fabulous?


The lines were pretty sharp and the paint really didn't bleed.  (It did soaak through in places, though, so be sure to protect whatever surface you use.)


After that, it was quick work to stitch up the two sides and stuff the pillow.


Viola!  My hand-painted pillow that my children say looks "just like you bought it at Pottery Barn".  Really, what else is there to say?

Wednesday, July 28, 2010

Quick Fix for Under $3

My neighbor was getting rid of this antique cabinet and I immediately thought it would work for Buttercup's room.  It is a really cute little cabinet and, while it needs some tender loving care, it is shabby chic the way it is now.  The piece was obviously some kind of curio cabinet and originally had a glass front which disappeared long before we got it.  Since Buttercup doesn't have a dresser, I thought this would work well for her and keep her room from feeling crowded.  She loves it and has been using it for two months.  Yes, it has taken me this long to put some fabric in it.  Better late than never, right?

Life calmed down and it was time to fulfill my pinky promise.  So, I headed to Walmart and bought a yard and a half of lightweight cotton fabric.  Attached it with a little velcro and, viola, a quick fix for under $3.

Oh, and Buttercup says it is just "perfect".  No greater praise than that, right?

Tuesday, June 22, 2010

Keeping Myself Honest and Saving Fabric for Specific Jobs

Since we're in the midst of aggressive debt reduction, I have to be very careful about any money we spend.  One of the things I cannot do anymore is buy fabric just because it is pretty.  I cannot troll the fabric aisles at Walmart or head to JoAnn's  or Hancock's to see what might be on sale.  Without a project in mind, I "just say no".  Any fabric I buy these days must have an assigned purpose.  (Tragic, I know.)

What I still can do, however, is take advantage of a sale before I'm ready to tackle a new sewing project.   For example, I found the perfect fabric for my new dining room seat covers when I was at the fabric store looking for a new piece of hardware for my overalls. It was an awesome deal on the right color on the remnant table and I nabbed it.   I haven't been ready to sew said seat covers, however, and keeping the fabric in the plastic bag from the store isn't very useful.  So, what do you do with fabric that you've assigned for a certain task, but you can't tend to right away?  You have to put it somewhere, right?  You want it protected.  You want to remember where you stashed it. You don't want to forget why you bought it, right?

Well, if you're like me, you probably hold on to weird things, such as these zipper pouches that curtain panels and sheets often come in.  (Oh, come on, you know it is so difficult to throw away something that looks like it should be so useful!)

I had a zillion of these at one time, but I did break down and donate most of them.  Still, I held on to quite a few because I was certain I could come up with something amazing and I did!


Ta Da!  These zipper pouches are perfect for special project fabric.  Most of them even have this little pouch that the labeling was housed in.  I just turned the label around and wrote my own label.   Not only do they keep the fabrics safe, they keep me honest.  I can't very well say I "need" fabric, when I've got some these fabric pouches waiting to be used, now can I?

P.S.  They're also terrific for wet bags, impromptu diaper/wipe stashes - even an extra baby outfit if you have a big enough bag (like one from a duvet cover or king-sized sheet set) - when I had babies, I had diapers, wipes, and a change for clothes for baby stashed in each car, each bag, and really anywhere I could think of.  They saved the day more times than I'd like to admit.