A tall order indeed.
So, with that goal in mind, in February I got brave and made myself an Aberdeen tunic out of French terry fabric. It was NOT a 100% success, but I learned a lot and it turned out well enough that I wore it IN PUBLIC a number of times, so it definitely counts.
 |
| I added 6" to the length of this tunic and cut it in a 2x to get the look I wanted. |
First things first: Aberdeen is a pattern from Colette Patterns. It is a downloadable PDF with almost terrific instructions for even the most beginner of us. It t-shirt tunic pattern, designed for knits...lightweight to sweater weight. (Honestly, my French terry didn't have enough stretch, but that was ignorance on my part and nothing to do with the instructions.)
Going for an oversized tunic, I decided to make the pattern in 2x. I wanted a sweatshirt tunic that would skim over my hips and fall below my butt. The only adjustment I made initially was to add 6" to take into account my height of 5'10" and the slightly longer than normal length.
All in all the construction went well. The only struggle was adding the neckline band. I think the instructions for inserting the band could be clearer...I really wasn't happy with the smoothness of the point of the v neck and the instructions really weren't clear to someone who had never done one before.
 |
| See that weird rumple? I couldn't resolve it...it bugs me!! |
A quick internet search did NOT net any clarification, either, so I just muddled through. Overall, though, my first Aberdeen came together beautifully and I did some things pretty well, if I do say so myself. The overall neck band turned out well, with the exception already noted.
 |
| Look at how clean that looks... |
Look at this collar band finish...so neat. The band met in back just perfectly!
 |
| Look at those bands meeting perfectly in the back...just gorgeous! |
...those points line up perfectly. The double stitched hem (a necessity with fabric that wants to roll!) also came out wonderfully.
 |
| A steady hand sewed those parallel lines! |
...it looks like the work of a twin needle, but it wasn't. It was my mad skills at the sewing machine!
I confess, I was pretty pleased with myself when my Aberdeen was completed...
...right up until I tried it on.
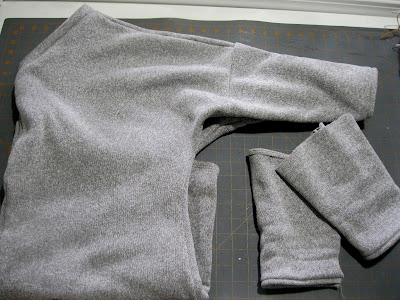
The sleeves narrowed too quickly for my long arms and were just too tight on my forearms (and I don't have big arms!). I was so disappointed. Ignorance fail, definitely. I should have known the arm length would need to be modified. Duh. So, I seam ripped the forearm seams and wore it around the house to see if it worked in other ways. One day of wearing and I decided the tunic was worth trying to save. French terry is sooo comfortable and I had just enough fabric left to take a chance on trying to modify the sleeves to redeem my project.
 |
| New sleeve...3" added. |
I calculated that I needed at least three more inches in sleeve length, as the sleeves narrowed too soon on my long arms and barely fell below my elbow. That meant changing the angle of the line of descent from the dropped shoulder to the forearm hem. So, I took the existing sleeve pattern, added a three inch strip of paper to the forearm hem and redrew the lines from the shoulder to the hem. That way the shoulder wasn't altered in any way and the ending sleeve opening wasn't bigger...it just took longer to get there. Since the tunic is batwing construction, I then just sliced off the sleeves at the dropped shoulder seam and attached my new sleeves.
 |
| Completed (again!) with longer sleeves. |
Success! It worked beautifully and gave me an eminently wearable tunic for the cold winter months.
In the grandest of compliments, the tunic has since moved to my teenaged daughter's closet. For the win!