Showing posts with label frugal. Show all posts

Wednesday, February 6, 2013

Scrabble Valentine's Tiles

I wish I could find the blog that gave me this idea, but a quick trip through my Pinterest boards didn't reveal a pin, so it is going uncredited.  Still, just know I didn't think of this on my own.

Aren't these cool?
Anyway, bought these giant Scrabble tiles for family friends for Christmas and when Superman saw them, he said he could have made them.  Well, yes, he could have, but we don't have a router set up to route the individual letters, and besides, I'd already purchased the gift.

See the slightly routered edge?  I love how the grain of the pine is so clear.
Turned out, Superman was right.  These were a quick and easy project.  He made quick work of cutting "tiles" out of 1 x 6 pine board, finished the edges with his router, sprayed on a few thin coats of lacquer and handed them off to me.  


Since they were specifically for Valentine's, I decided to use
a font with more flourish than the actual Scrabble font.
(I think I actually spent more time playing with fonts on the Silhouette machine than he spent prepping the tiles!)  I applied the vinyl letters (with their appropriate points value, of course) and they were done.

Scrap wood and a little time gave us a really cool decoration!
Love them!   Best of all, we used scrap wood, had the lacquer, and the vinyl, so they were a free project!

Tuesday, September 25, 2012

Unanticipated Bathroom Update - Quick Custom Art Project

Last year, I showed you the pictures of our bathroom redo here.  Nothing much changed in the ensuing months...until Superman came home on leave in June.  Remember these two little vases on the shelf?
RIP two little Ikea vases.  The previous "picture" was too little anyway.
  It was a mushy greeting card Superman had given me early in our marriage...
I loved it so much, I framed it and have it up somewhere in our house all the time
They were pretty, weren't they?  Well, in one move, Superman bumped the shelf with enough force to knock them both off the shelf and send them crashing to the floor.  Bye-bye, Ikea vases.  After Superman went back to work, I rearranged to make it look like this. 

There have been fires in the area for more than a week...look how the
quality of the light is altered by the filter of smoke.  Do you like my blank
wall?  I even left the nail in place to nag at me to come up with art for the space.
I left a big blank space under the shelf and waited for inspiration. Well, here we are in September and inspiration took its sweet time!!  Fortunately, Costco supplied the missing piece and the project came together in a day.


These frames are really nice...didn't think to take a picture before the project.
Inspiration comes in the strangest forms, doesn't it?
Saw these frames at Costco...11 x 17 with matte...two frames for less than $20, plus 100 free prints from Costco.  These frames, combined with thoughts that had bouncing around in my head, resulted in the perfect art piece for our bathroom.  All it took was a piece of fabric and a vinyl cutout and 20 minutes later, we had "art".


The card is on the shelf now and my new art is on the wall...this new arrangement
is so much better and I still have my framed greeting card...plus a gift from my
daughter...the little sheep (including the black sheep) were a present.  I love them.
Look at this.  All I did was tape a piece of fabric to the back of the matte and apply a vinyl cut-out to the front of the fabric.  (I didn't even use iron-on vinyl.  This is just standard vinyl...Oracle 631 from Expressions Vinyl.)  I tucked the end of the branch under the matte to make it look like the branch was coming out from behind the matte.  After that, I put it all back together and put it up on the nail that was still in the wall. 

The original nail was too low, so I moved it up an inch.  Plus, the picture
was missing a little something.  It needed just one more thing.  Do you see it?
I love how it turned out.  Unfortunately, the nail wasn't in the right place, so I have a new nail hole (sorry, Superman!).  Plus, I think picture was missing a little something...it wasn't quite perfect.

There!   See?  I added a tiny heart above the birds.  The perfect
finishing touch!  Now, my project is just perfect.
Ah, now it is perfect!  I love the way this project turned out.  The nubby fabric and the smooth, matte vinyl look elegant framed with a picture matte.  I have one more frame...I need to find another place that is crying out for an art project!

Monday, September 10, 2012

Quick Drawer Customization

My desk drawers are a weird size.  I've struggled to keep them organized, but I confess I've been only marginally successful.  Last week, I'd finally had enough and decided to tackle a reorganization project I've been thinking of for a while.
 
Doesn't everyone have a box knife, an exacto knife, and a chalk pencil in
their desk drawers??
 First, I emptied the drawers completely.  (Of course, it wasn't until the drawers were mostly empty that I remembered I needed a picture...sigh.)  As you can see, I had these organizing trays in the drawers, but they really didn't fit well and left unused and inaccessible space behind the tray and well as open space to the side of the tray.


This tray doesn't fit well...the siders are too short and the tray
doesn't fit well within drawer, leaving hard to access space.
Once I had empty drawers, I got to work.  I'd saved some wooden slates from an Ikea something that I just knew would come in handy and would make this project free!   (I think it was a couch of Charming's, but I really can't remember--Superman would remember exactly where these came from...that is how he rolls!)  I measured in the inside dimension of the drawers (individually, just in case they weren't exactly the same - they weren't!)  I headed to the garage and used the chop saw to cut a few of the slates to the inside length of the drawers. 
Played around with the dividers and some of the intended contents of
the drawer to see what configuration would be the best...
Then I started playing with various configurations until I settled on an arrangement that would work for me.  That was actually the most difficult part.  One drawer ended up with more sections than the other.
They're difficult to see in this photo, but the pieces are held together by staples.
Once I'd figured out the configuration I wanted, I used the brad nailer/stapler to put all the pieces together.

This drawer has fewer sections...it took only two pieces to make my
dividers...customized to my specifications!
Half an hour later, I had customized drawer dividers.  This could be done with heavy weight cardboard, too.  Look around...you might have something laying around that just might work.

This drawer took a little more time, but it was so worth it.
Best of all?  The dividers are completely removable in case my needs/wants change.   Did I mention I have two more drawers filled with sewing stuff and another handful of slats?  Not sure how I'll arrange those, but I'm sure I'll come up with something!

Friday, May 25, 2012

What to do with used up candles...

I love having a burning candle in my kitchen.  The way our home is layed out, the scent from that one candle wafts through the entire house.  The only frustration?  When the candle wick is gone, but the wax isn't used up.  Don't you hate that?  I just couldn't stand throwing away a not-completely used up candle...it seemed so wasteful.  Pretty containers and plenty of wax at the bottom of those containers...there just had to be a way to use them.

New Candles, New Tarts, and come extra containers!
I've shown you some of the things I've done with empty candle containers here.  I still love my little q-tip and cotton ball containers.   Still, those didn't address the waste of unused wax.


Love this Target candle, but I hated that I couldn't get to the
bottom of it!  That is a lot of wax!
I had a lightbulb moment when I was walking through Michael's and saw wicks for people who make candles from scratch.  I started saving all my "used up" candles.  Once I had quite a few (basically an entire winter's worth), I got to work.


The fruits of my labor doing it the hard way!
(Oh, and you could just chip the old wax out, but that is slow and painful...still, I am a slow learner, so I did have some of that, too!)


This still needs to be melted and get a wick!
First, I put the glass containers in a sauce pan with water that hit about half way up the candle containers and set it to boil.  Don't use your microwave for this step!!!  The wicks have a metal anchor and you will ruin your microwave!!!

See how the candle wax has melted and turned clear?
As I melted each candle remnant, I transferred the liquid wax into one of two types containers.  First, for those candles where I had a good amount of wax of the same scent, I transferred the liquid wax to a clean container.

This is the liquid from three "used up" candles.  They combined to make half a
new candle for the price of one wick and some of my time..
 Then, I added a wick, wrapping the excess around a chopstick to hold it in place while the wax cooled.
This is after the first liquid wax has been poured in.  I didn't worry about
debris in the wax, but you could strain with cheesecloth if it bothers you.
Once the wax was cooled, I trimmed the wick, and had a new candle. (Or, as you can see, I had a lot of new candles!)

The fruits of my afternoon's labors...
For those candles where I only had a small amount of wax remaining, I poured the liquid wax into silicon cupcake liners.  (You can do paper, but it seeps, so use two or three liners for each tart.)

A tart!  The oils in the candle make it easy to pull the liner off the cooled wax.
 Once these cooled, I had new tarts for my tart warmer.

One other thing, to do this, you'll need a clean container ready to become a candle before you've even melted your first bit of wax.  If you don't have an old one handy, try using a mason jar or some other little jar you've got laying around.  You can even use votive holders.  This is really a frugal project.

A note:  Once you've poured all the liquid wax from your container, most likely you'll be left with something that looks like this.  While it is still warm, it is easy to use a long fork to pop the old wick base out of the container and it will bring most of its adhesive with it.  If you're planning to reuse the container as a candle, then you're done.  If you're going to use the container as something else, you'll need to use Goo Gone or some other adhesive remover to get the last little bits of glue.
 
The used up wick is held in place by adhesive you'll want to remove
before you repurpose the container, but not if it will be another candle.

 So, don't throw away your old candles...save a few and get more life out of them and have a little fun while you're at it.  You can even make layered candles if you'd like...just cool your layers before adding the new wax. 

Wednesday, May 23, 2012

Silhouette Madness...More Labeling Because I Can...Plus a Frugal Tip

I have been having fun with my Silhouette Machine again.  This time, I headed back to the laundry room and the kitchen.  I know, I know...labeling your laundry room?  Really.  Oh, yeah.


Hey, I spend a lot of time in my laundry room.  Don't you?  I'd already gotten rid of the boxes in favor of these cool cannisters, but they needed a little more.


To cut the cost of this project, I used black contact paper instead of black vinyl for the badges.  (You can use black contact paper for "chalkboard" vinyl, too, it is just not quite matte.) Then I just topped them off with white vinyl lettering. 

Love how the white vinyl pops off the black!
I think they turned out really well.  I love how fun, yet simple they look.

Then, a few days ago, I found this awesome soap dispenser at World Market.  It is glass...and it is Mrs. Meyer's so it smells divinely...truly, isn't it fabulous? 

Mrs. Meyer's Wash Up - Love This Dispenser!
With the cool soap dispenser on the one side of the sink, I decided to add a little focus to my dish soap dispenser.  I love this dish soap dispenser.  I've had it for years and years. 

Just jazzed up with some basic black lettering.
(Can you tell I don't like the original packaging that most things come in?  Seriously...I switch out my laundry stuff, I switch out my liquid soaps...maybe I have an issue?  Nah...)

Finally, here is my frugal tip for you.  If you work with the vinyl cutters (Silhouette or Cricut), you know the challenge of weeding the excess vinyl (or the paper or fabric you've cut).   I've been using an exacto knife, but sometimes the fine work was challenging.  I was really tempted to buy one of those weeding tools that go for upwards of $14 on the websites when it occurred to me that I could get exactly what I needed at my local Walgreens for about $4.   

 
For a lot less money, you can use drugstore dental tools to weed your vinyl!
Did you figure it out?  They're drugstore dental tools!  You can easily use your handy-dandy dental tools to weed.  Pretty cool, right?  Yeah, I thought so!

Monday, March 19, 2012

Frugal Animal Beds

With four cats and two dogs, I always have animals laying around.  Seriously.  They're just laying around all over the place.  In the past, I've spent money on animal beds, but oftentimes, they were cheap material that couldn't stand up to washing and I need to wash them...a lot.  I needed a better, but still frugal solution.  Two rag towels, an old floor pillow, and twenty minutes later, I had a fully washable dog bed.  It turned out so well that I wanted to make some more animal bed covers, so I headed to Target and bought their $3.50 bath towels and made two more.  (The rag towels worked well, but I didn't take pictures.)  Here is how I did it:

We just use old pillows for animal beds.
Lay one towel on the floor.  Lay your pillow on top of the towel, closer to one edge of the towel.  Leaving the same amount on the opposite edge, cut off the excess.  Don't discard as you'll be making an envelope closure for this pillow.  (Great tutorial on envelope closures here.)

Lay the pillow you're using on one towel.
Now, pick up the pillow, but leave the portion of the towel that had been under the pillow in place.  Take the piece that you've cut off and lay it on top of the towel, matching the cut-edge to the outside edge of your towel.

Putting the finished edge on the inside makes this a quick project.  Your
envelope folds are already finished.

Now you'll take your second towel and cut it to a length that is one half the width of your pillow and lay it on top of the other two pieces of towel that you've already cut, making sure to put the finished edge on the inside of the pillow, just like you did with the second piece.  Pin all three layers together and sew around the outside edge. 

Sew all around the edge...in some places you'll be going through three layers
of towel...just be sure to catch those inside edge.

Flip your pillow cover right side out and insert your pillow.  Lay it on the floor and see who gets it first.


Cat bed?

Dog bed?  Either way, this one is in Buttercup's room now.


Well, either way, cat or dog, it is an animal bed that cost $7 and twenty minutes to make.  It is oh-so-washable.  Just what we need in this menagerie!

If you don't have a serger, you can just zig zag the edges.
Oh, and you'll have extra toweling.  I cut mine into squares, serged the edges, and got myself a bunch of new washcloths.  Not bad for $7!!


Wednesday, November 2, 2011

Fall Decor...Heading Into Thanksgiving...

Well, Halloween is put to bed for another year and with it are our Halloween decorations.  Yep, I'm one of those who changes out the decor immediately.  The day after Halloween, all of our jack-o-lanterns and black cats and cute witches were put away and out came our turkeys (not too many) and our autumn leaves and some not-jack-o-lantern pumpkins, along with a few scarecrows.  I thought it would be fun to share some of the details of my holiday decorating with you.

This is the view from my kitchen as I look out to the rest of my house.  It makes me smile to when I look up from my kitchen chores.


This is my mantle.  (Recognize the candle sticks?)  I've been wanting fat burnt orange candles for a few years, so I was thrilled when I found these at World Market last month.  My wreath is an old one from Pottery Barn post-holiday clearance.  It has held up really well.  My little turkey was another post-holiday clearance find.  (Notice a trend?)


 How about this subway art from Today's Fabulous Finds (Janet does one in various colors for every occasion and gives them to us for free!!)  The pumpkins were in Target's Dollar Spot and I just stuck leaves from some fake flowers on them to give them a little more oomph.


Here is the kitchen...just a few pumpkins on top of the cabinet.   (They're fake, too.  Bought them a few years ago from Michael's with a coupon...they were something like $3 each.)  Simple, yet festive, I think.


Even the dining room gets in on the act.  I added a pumpkin candle, changed out the flowers on the buffet, some leaves on my centerpiece, and a little turkey on my antique clock.


Oh, and don't forget the Angry Bird under the table.  (Do you see it?  It is there on the rug.)  The cats obviously think the room needed a little something more.

I know I'm more minimalist than a lot of people who decorate for the seasons, but it works for me.  I love the simple additions to acknowledge the flow of the year, but I can't stand to be overwhelmed by them (at least until I get to Christmas!!). 

What about you?  Do you switch it out or do you just leave it be?

Wednesday, October 12, 2011

Coolest Thing Ever!

So, this might not be a big deal to you, but figuring out what to do with our bikes as the weather turns is a big deal to me.  We have four bikes to accomodate and I have some constraints to how I want to store them:  I want them out of the way, but accessible (because we don't always have snow on the ground).  We don't have rafters, so we can't use a pulley system to get them up out of the way.  We do have a shed in the corner of the backyard, but getting them in and out of there is a pain in the rear.  So, imagine my surprise when I solved my dilemma for $34 spent at Harbor Freight!  (I had a coupon...they're normally $47.99.)


Let me introduce you to our Bike Tree.  It is holding all four of our bikes (bikes for tall people take up a lot of room!) and is easy to maneuver.  It can be rolled out of the workshop area of our garage whenever I want to use it as a workshop and quickly rolled back in when I'm done.

It took me half an hour to assemble it and then it was ready to go.  Had one of the kids hold the tree steady while I got the first bike on the tree and after that, it was easy to get the rest of them up there.  Notice that the seats are on alternating sides of each other...that makes the bike tree stay balanced.  The best part?  The footprint of the bike tree is 30" square.  Yes, our bikes stick out more than that, but not enough to make it be a problem and smaller bikes wouldn't extend past the base of the tree.


 Come on!  Admit it.  This is pretty darned cool!

Thursday, October 6, 2011

New Use for Old Candle Jars

I love candles.  I really do.  I like them enough that I actually use them up.  My frugal soul hates throwing away the empty jars.  They're really nice looking, but they're not food-grade, so you can't use them for candy or nuts (unless the candy is individually wrapped, of course).


One oldcandle jar from Target with wicks burned all the way down.  (I love this candle...it smells amazing.)  Pop out the last of the wax and save it for your tart burner.  Use Goo Gone to get the label off and wash and dry the jar.  Ta Da!  You have a jar ready to use.

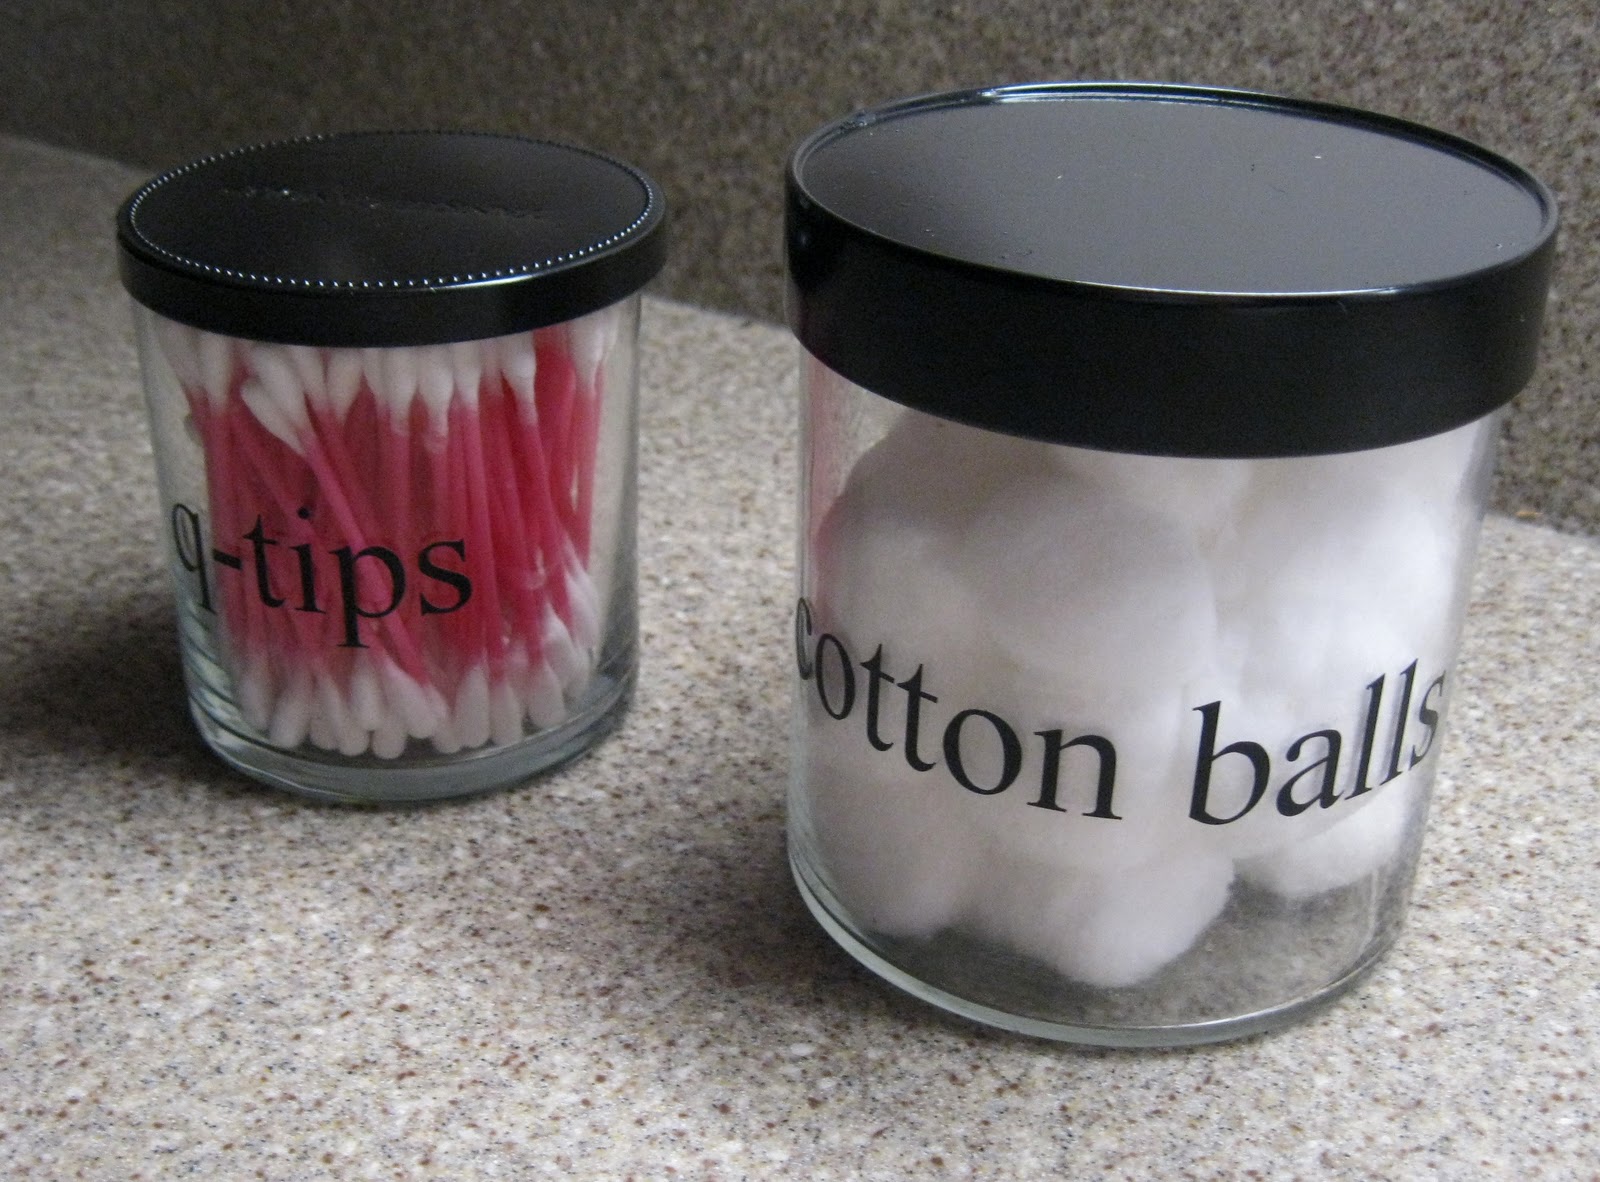
Here are two I've already begun to work with.  One is a little one from Yankee Candle and one is my first Target candle (told you I liked them!).  Took the labels off and washed them and these jars are both pretty enough to be used for all kinds of things:  buttons, paper clips, safety pins, etc.   I thought mine would work beautifully in my bathroom, so I added some q-tips and some cotton balls and they're ready for work. 


Still, I had a little something different in mind.  A quick coat of spray paint gave me black lids.

Much better!  They looked good, but still weren't quite what I was after.


 Ah, a couple of labels gave them the finishing touch!  Perfect, don't you think?

Since the candles were already paid for and used, these little jars were practically free.  I love it when things turn out well, don't you?