Showing posts with label Desk Before and After. Show all posts

Monday, September 10, 2012

Quick Drawer Customization

My desk drawers are a weird size.  I've struggled to keep them organized, but I confess I've been only marginally successful.  Last week, I'd finally had enough and decided to tackle a reorganization project I've been thinking of for a while.
 
Doesn't everyone have a box knife, an exacto knife, and a chalk pencil in
their desk drawers??
 First, I emptied the drawers completely.  (Of course, it wasn't until the drawers were mostly empty that I remembered I needed a picture...sigh.)  As you can see, I had these organizing trays in the drawers, but they really didn't fit well and left unused and inaccessible space behind the tray and well as open space to the side of the tray.


This tray doesn't fit well...the siders are too short and the tray
doesn't fit well within drawer, leaving hard to access space.
Once I had empty drawers, I got to work.  I'd saved some wooden slates from an Ikea something that I just knew would come in handy and would make this project free!   (I think it was a couch of Charming's, but I really can't remember--Superman would remember exactly where these came from...that is how he rolls!)  I measured in the inside dimension of the drawers (individually, just in case they weren't exactly the same - they weren't!)  I headed to the garage and used the chop saw to cut a few of the slates to the inside length of the drawers. 
Played around with the dividers and some of the intended contents of
the drawer to see what configuration would be the best...
Then I started playing with various configurations until I settled on an arrangement that would work for me.  That was actually the most difficult part.  One drawer ended up with more sections than the other.
They're difficult to see in this photo, but the pieces are held together by staples.
Once I'd figured out the configuration I wanted, I used the brad nailer/stapler to put all the pieces together.

This drawer has fewer sections...it took only two pieces to make my
dividers...customized to my specifications!
Half an hour later, I had customized drawer dividers.  This could be done with heavy weight cardboard, too.  Look around...you might have something laying around that just might work.

This drawer took a little more time, but it was so worth it.
Best of all?  The dividers are completely removable in case my needs/wants change.   Did I mention I have two more drawers filled with sewing stuff and another handful of slats?  Not sure how I'll arrange those, but I'm sure I'll come up with something!

Tuesday, January 4, 2011

Taming the Beast


All during the holidays, my desk was the dumping ground for anything I couldn't deal with right when it came up.  "Mom, where do you want me to put this widget?"  Just put it on my desk, Honey.  "Mom, what should I do with the mail?"  Just put it on my desk, please.  Why? My desk is in the basement and I can keep the rest of the house presentable when my desk has become a beast.  Sending anything to my desk gets it out of the main level of the home and allowed me to continue to bake or cook or wrap or entertain without stopping.

 
After Christmas, however, it was time to tame the beast.  Oh, and I really mean "beast".  Look at the picture I took AFTER I'd already started to put stuff away in its proper home.  (Yes, that means the desk was worse than this before I thought to pull out my camera.) 


The problem with a messy desk (at least for me) is that it is a mirror of a messy mind.  Yes, the stuff was out of sight, but it was not out of mind...it lay there, weighing on me.  Waiting for me and taking my mental attention from other things.  Taming this desk was important for my organizing season fresh start.


Now look at my desk.  Looks good, doesn't it?  More than that, it feels good.


When my desk is in order, everything seems to fall into place with ease and my minds feels as uncluttered as the desk appears. 

Doesn't it looks good?  I'm pretty pleased with how it looks, if I do say so myself.  (Now I just need to finish painting down here!)

Tuesday, September 14, 2010

Before and After of my Own...Drawers to Shelves

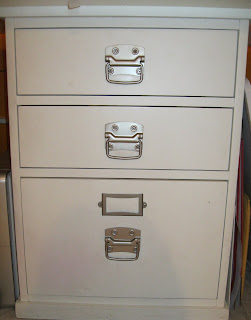
I have loved my desk since we bought five years ago.  It has served its purpose well.  In five years, however, my needs and wants have changed.  I've reduced, tremendously, the amount of paper I'm keeping/storing.  The drawers were inefficient for my purposes, so I decided to do something about it.

This is what my first one looked like before I modified it.

This is what it looks like now.

I liked it so much that I decided to do the same thing to another part of the desk.  This time, however, I took pictures along the way to show you how I did it.

First, I pulled out the drawer.

Then I removed the drawer hardware.

Then I added those little blocks of wood so I could attach a new shelf base to the section.  [I had to redo those little blocks of wood because my original ones were too thick and didn't allow the bottom drawer to close.]

Then I attached a board (the back from one of my Ikea shelves, cut down with the saw) to the center divider and to the pieces of wood I added.

Viola!  I went from a drawer to a shelf and my efficient use of my desk.  Oh, and yes, those are Swiffer refills...if I have them in the basement with me, I dust the basement more often!


I can't tell you how much more I like this desk.  Having a place for more of our school books and a better way to store my various papers and reference books feels so nice.